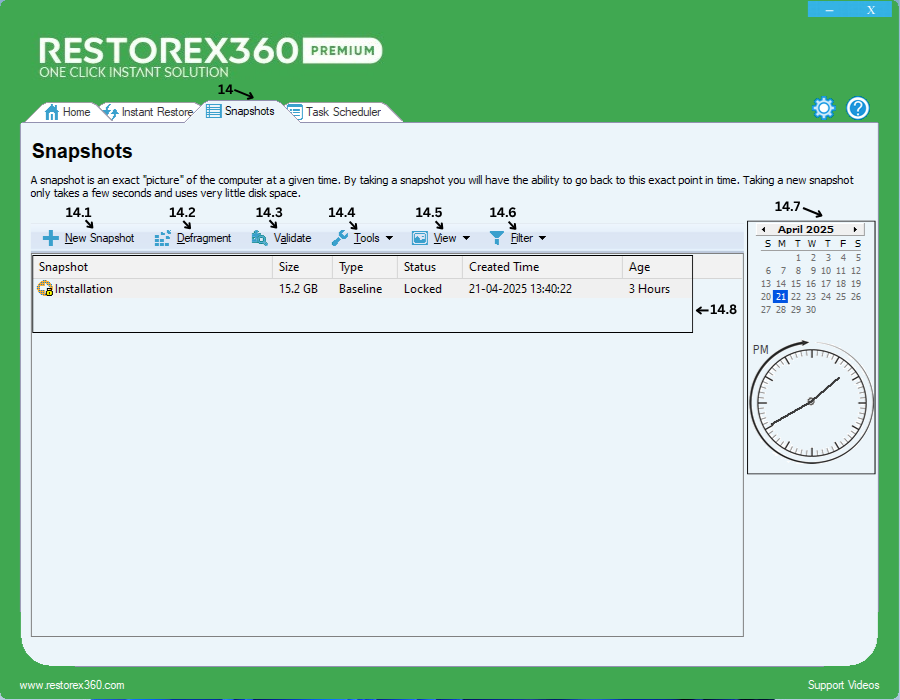
4.1. Snapshots
Important: If, for any reason, you delete the Installation Snapshot (Baseline), you will no longer be able to roll back to any existing snapshots. In such a case, you must turn off protection and re-enable it to start fresh.
Please note: Turning off and then turning on protection will permanently delete all previously created snapshots.
14.1 New Snapshot
A New Snapshot in RestoreX360 is a complete backup of your system's current state, including files, settings, and system configurations. It captures everything at a specific point in time, allowing you to restore your system back to that exact state whenever needed.
How It Works
1. Snapshot Creation
When you click on "New Snapshot", RestoreX360 captures the current state of your system.
2. Lightweight & Fast
RestoreX360 uses advanced snapshot technology that is fast and storage-efficient. Only the changes made after the snapshot are tracked, reducing the space required.
3. Rollback Capability
If your system crashes, becomes unstable, or gets infected by malware, you can easily roll back to the snapshot with just a few clicks—restoring your system to the exact condition it was in when the snapshot was taken.
4. Multiple Snapshot Types
RestoreX360 supports different snapshot types:
-
Baseline Snapshot – Initial clean state (usually right after system setup)
-
User Snapshot – Manually created at any point
-
Automatic Snapshot – Created by the system based on events or schedule5. Safe & SecureSnapshots are stored in a protected zone to prevent deletion or modification from external threats or system changes.
Use Case Example
Before installing a new software or Windows update, create a New Snapshot. If something goes wrong, simply roll back using RestoreX360, and your system will be back to the way it was before.

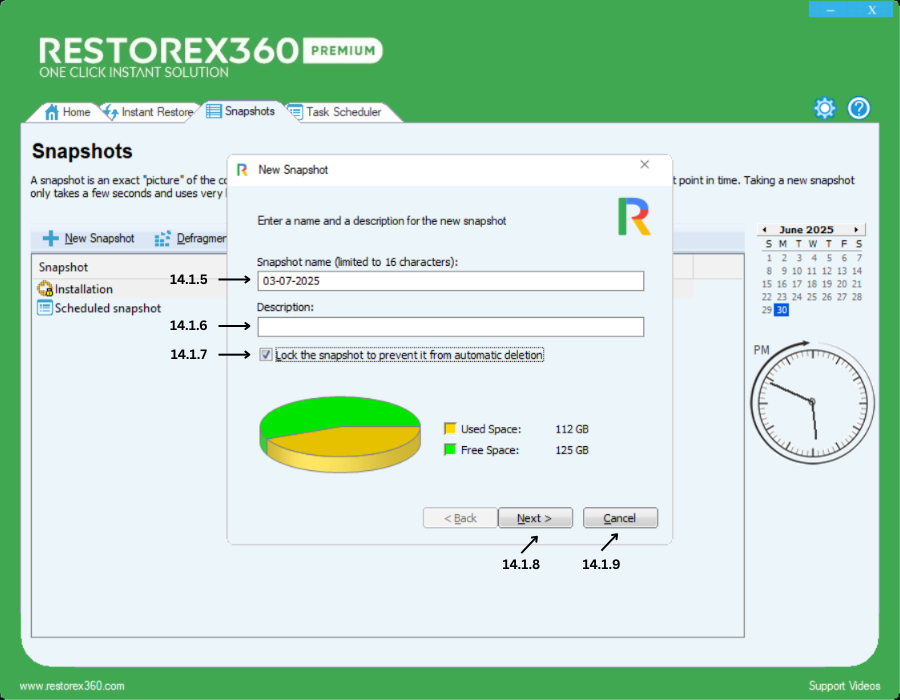
14.1.1 Snapshot Name
Enter a custom name for your snapshot. You can use up to 16 characters.
14.1.2 Description
Provide a brief description for the snapshot. You can enter up to 25 characters to describe the purpose or context of the snapshot.
14.1.3 Protect Snapshot
Enable this option to lock the snapshot to prevent it from automatic deletion, do not delete it from being automatically deleted by the system during cleanup or space optimization processes.
14.1.4 Cancel
Click to Cancel the current window without saving any changes.
14.1.5 Snapshot Name
Enter a custom name for your snapshot. You can use up to 16 characters.
14.1.6 Description
Provide a brief description for the snapshot. You can enter up to 25 characters to describe the purpose or context of the snapshot.
14.1.7 Protect Snapshot
Enable this option to lock the snapshot to prevent it from automatic deletion, do not delete it from being automatically deleted by the system during cleanup or space optimization processes.
14.1.8. Click "Next"
Click Next to create a new snapshot of your current system.
14.1.9. Click "Cancel"
Click Cancel to close the current window without saving any changes.
14.1.10 Taking New Snapshot
While creating a new snapshot, please wait until the process is complete.
Important: If possible, we recommend closing all applications and background processes before creating a new snapshot to ensure accuracy and stability.
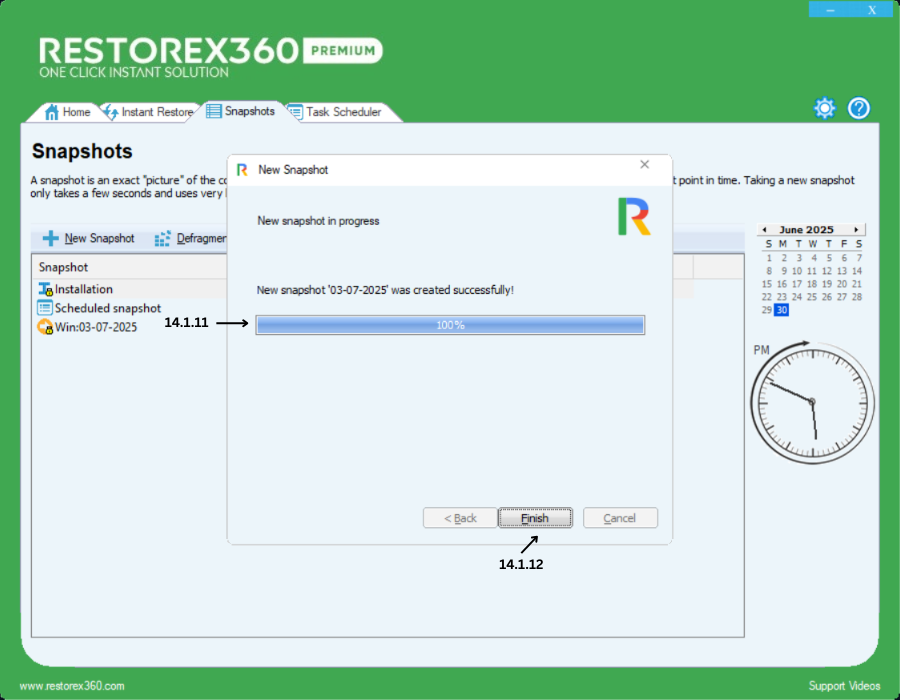
14.1.11 Finish New Snapshot
Once the progress reaches 100%, it means the snapshot has been created successfully.
14.1.12 Finish
Click Finish to close the current popup window.
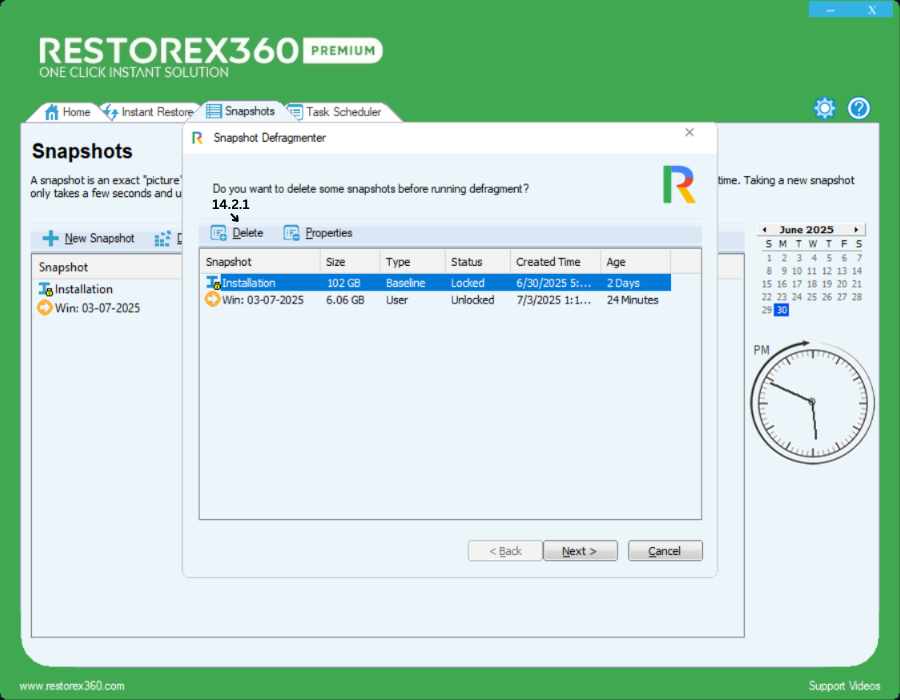
14.2.1 Delete Snapshot
Before deleting a snapshot, ensure that it is unlocked. If the snapshot is locked, you must unlock it first before proceeding with deletion.
Important: Do not delete the Installation Snapshot (Baseline), as it is essential for performing rollbacks.
14.2.2 Properties
Click on Properties to view detailed information about the selected snapshot, including:
-
Snapshot Name
-
Description
-
Created Date and Time
-
Type
-
Status
-
Quality
-
Disk Space Usage
This allows you to review all relevant details of the specific snapshot.
14.2.2 Snapshot Properties
14.2.2.1 Name
Displays the name of the snapshot as entered during creation. You can modify the name here and click OK to save the changes.
14.2.2.2 Description
Shows the description provided when the snapshot was created. You can edit the description and click OK to save the update.
14.2.2.3 Created
Displays the exact date and time when the snapshot was created.
14.2.2.4 Type
Indicates how the snapshot was created:
-
System – Created automatically by the system
-
User – Created manually by the user
14.2.2.5 Status
Shows whether the snapshot is currently Locked or Unlocked.
14.2.2.6 Quality
If the snapshot has been validated, this section displays the quality status. Like Good and Poor It verifies the integrity of your Windows system and hard disk sectors.
14.2.2.7 Disk Space
Displays the amount of disk space used by the snapshot and the available space on the disk.
14.2.2.8 Refresh
Click Refresh to update the displayed information after making any changes or updates.
14.2.2.9 OK
Click OK to save any modifications made to the snapshot details.
14.2.2.10 Cancel
Closes the window without saving any changes.
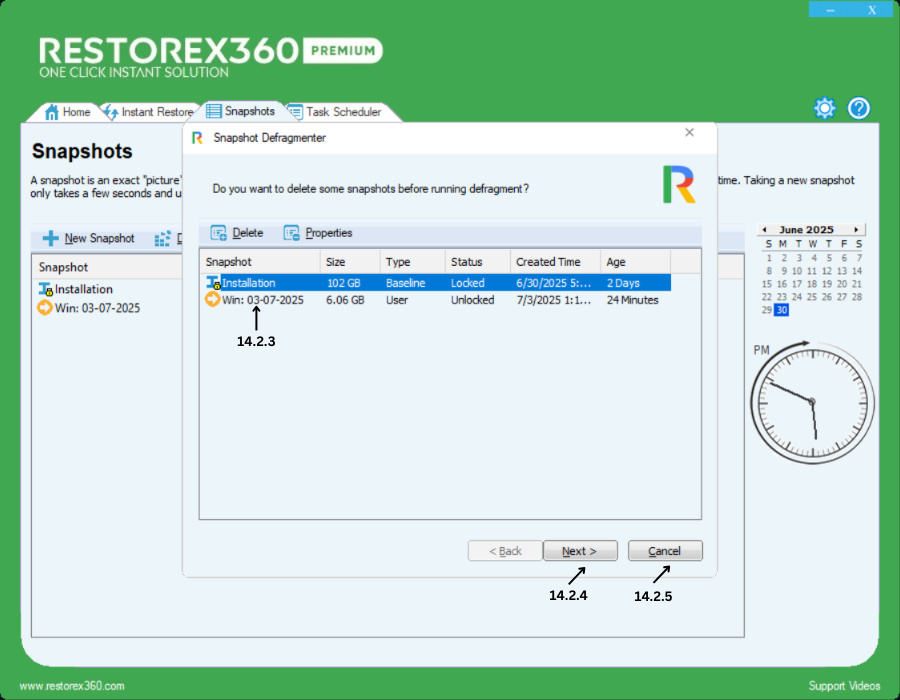
14.2.3 Defragment Snapshot
Select any one snapshot and click Next to begin the defragmentation process. This will optimize all snapshots and help automatically manage and reduce their disk space usage, improving system performance.
14.2.4. Click "Next"
Click Next to defrag all snapshot of your current system.
14.2.5. Click "Cancel"
Click Cancel to close the current window without saving any changes.
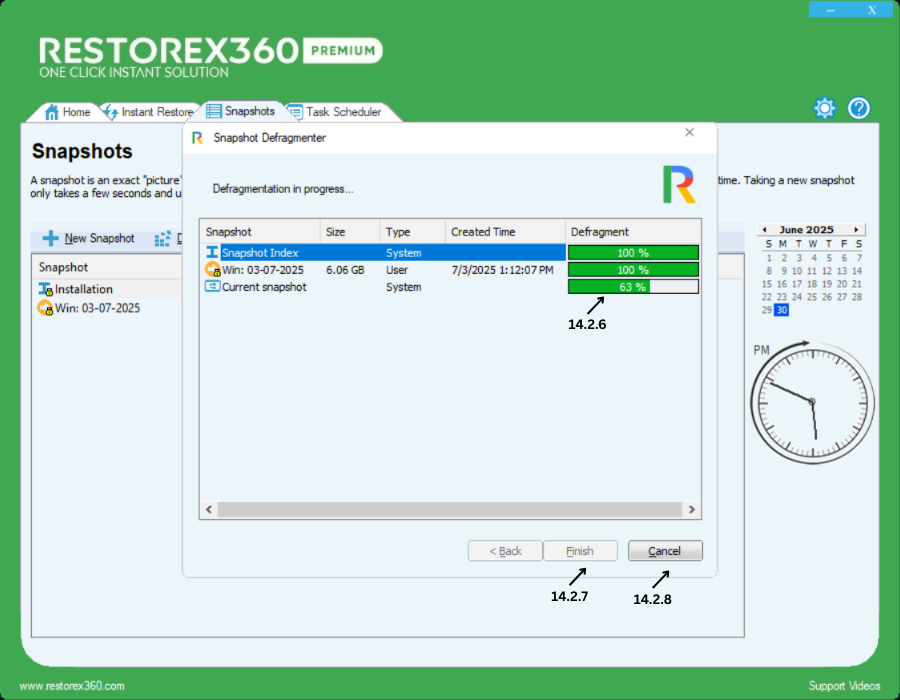
14.2.6 Defragmenting Snapshots
During the defragmentation process, please wait a few minutes for it to complete.
This process helps optimize and reduce the size of your snapshots by removing unnecessary files such as temporary files, prefetch data, and other system clutter.
14.2.7 Finish
Once the defragmentation process is complete, click Finish to close the window.
14.2.8 Cancel
If you wish to cancel the defragmentation process, click Cancel.
Note: RestoreX360 does not recommend canceling during the defragmentation process. Please wait until it is fully completed to ensure optimal performance and stability.
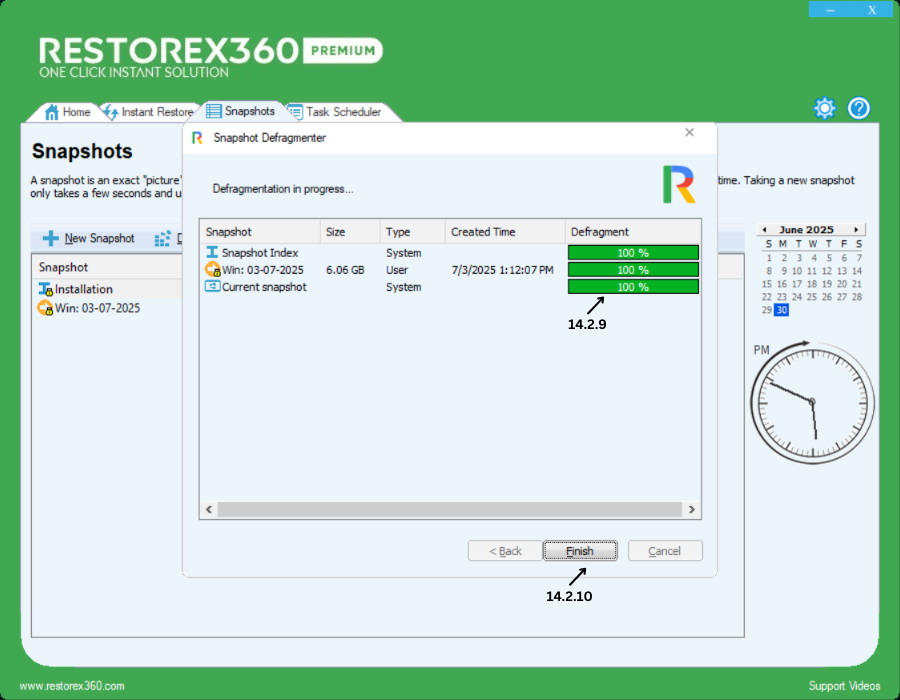
14.2.9 Defragmentation Complete
Once all snapshots show 100%, it means the defragmentation process has been successfully completed.
14.2.10 Finish
After the defragmentation is complete, click Finish to close the window.

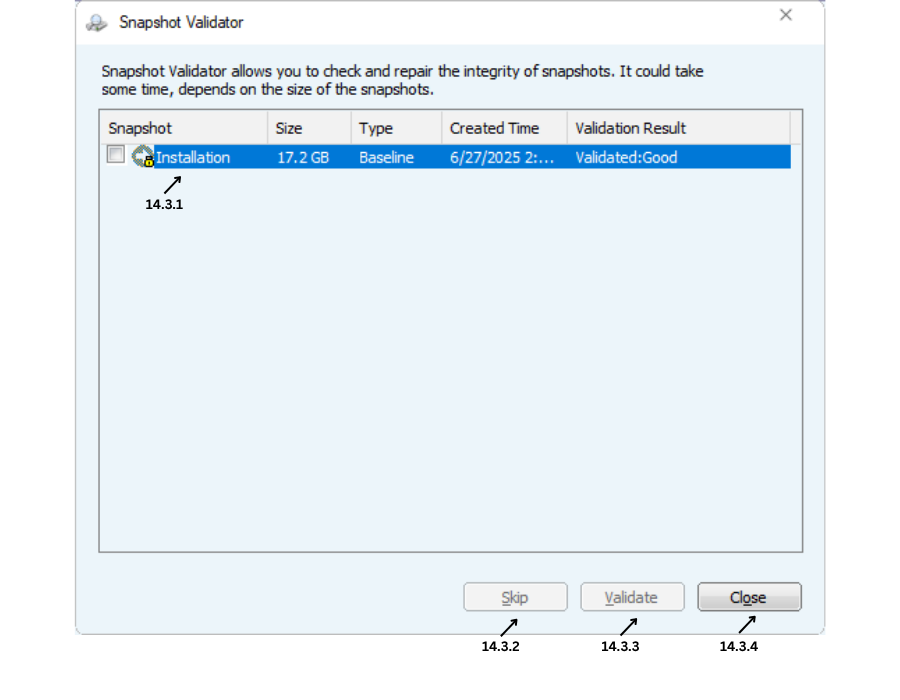
14.3.1 Validation Result
The Validation Result displays the status of each snapshot based on its quality and usability. There are three possible outcomes:
1. Unvalidated:
This means the snapshot has not been validated. The validation tool was unable to recognize or assess the snapshot's quality.
2. Validated – Good:
The snapshot has been successfully validated and is considered Good. It is recognized by the validation tool as safe and reliable for future rollback.
3. Validated – Poor:
The snapshot has been validated but found to be Poor. It may not be reliable for rollback, and the validation tool does not approve its use.
14.3.2 Validate
To validate all snapshots, click the Validate button. This will check the integrity and reliability of each snapshot.
14.3.3 Close
To exit the validation window, click the Close button.
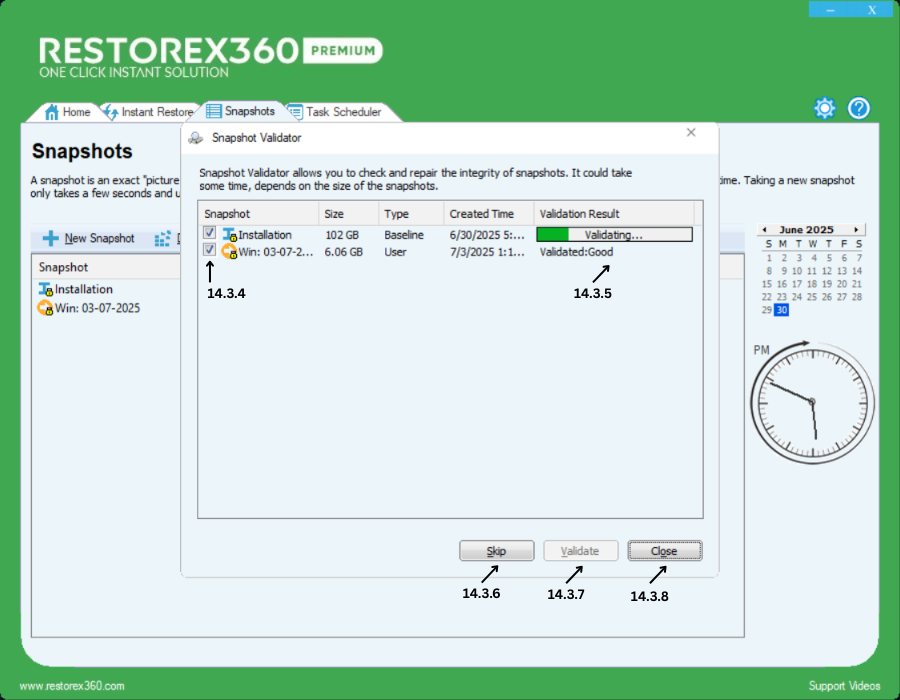
14.3.4 Select Snapshot for Validation
To validate a specific snapshot, tick the checkbox next to the desired snapshot and then click the Validate button.
14.3.5 Validating Process
Validation checks various system criteria, including Windows integrity and hard disk health (e.g., bad sectors). This process may take some time. Please wait until the results are displayed.
14.3.6 Skip
If you want to exclude a specific snapshot from validation, tick the checkbox next to it and click Skip.
14.3.7 Validate
To validate all selected snapshots, click the Validate button. This process ensures the snapshots are stable, reliable, and safe to use for rollback.
14.3.8 Close
Click the Close button to exit the validation window.
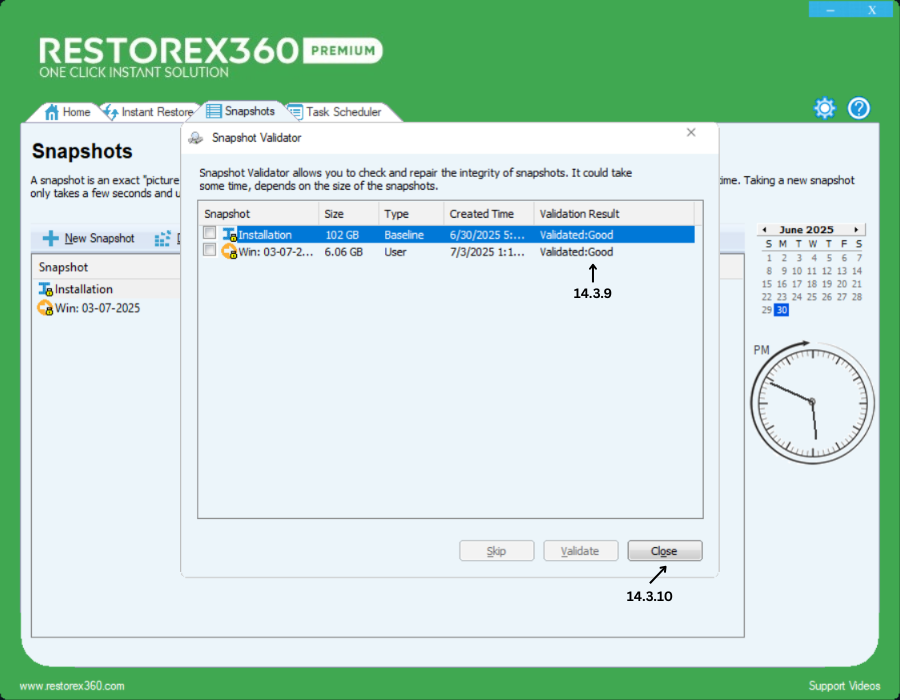
14.3.9 Validation Result
The Validation Result displays the status of each snapshot based on its quality and usability. There are three possible outcomes:
1. Unvalidated:
This means the snapshot has not been validated. The validation tool was unable to recognize or assess the snapshot's quality.
2. Validated – Good:
The snapshot has been successfully validated and is considered Good. It is recognized by the validation tool as safe and reliable for future rollback.
3. Validated – Poor:
The snapshot has been validated but found to be Poor. It may not be reliable for rollback, and the validation tool does not approve its use.
14.3.10 Close
Click the Close button to exit the validation window.
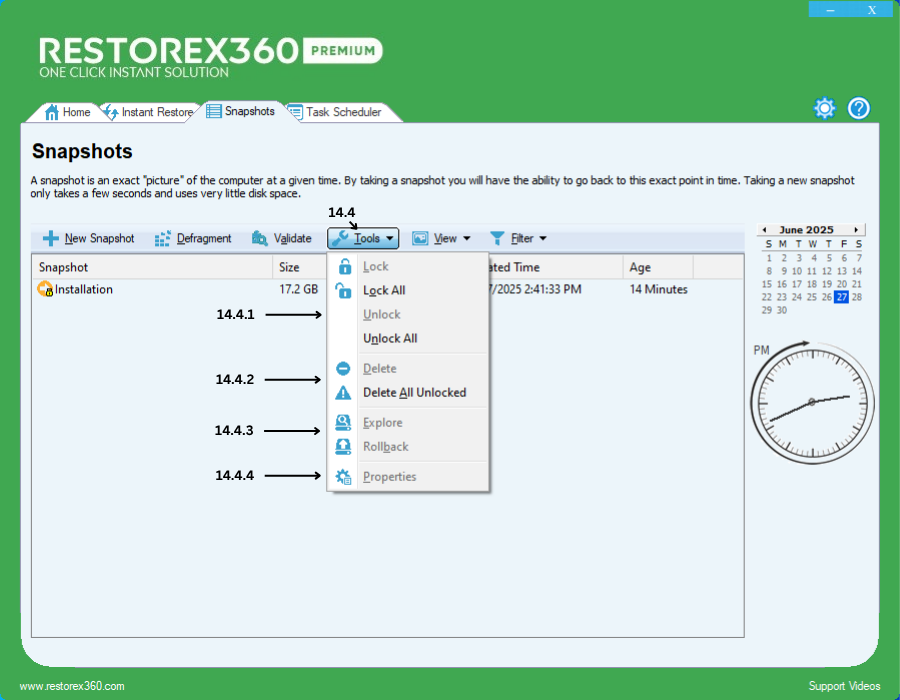
14.4 Tools
The following tools are available for managing snapshots:
14.4.1 Lock – Lock the selected snapshot to prevent it from being modified or automatically deleted.
Lock All – Lock all available snapshots at once.
Unlock – Unlock the selected snapshot to allow modifications or deletion.
Unlock All – Unlock all snapshots at once.
14.4.2 Delete – Delete the selected snapshot (must be unlocked).
Delete All Unlocked – Delete all snapshots that are currently unlocked.
14.4.3 Explore – Open and browse the contents of the selected snapshot.
Rollback – Restore the system to the state captured in the selected snapshot.
14.4.4 Properties – View detailed information about the selected snapshot.

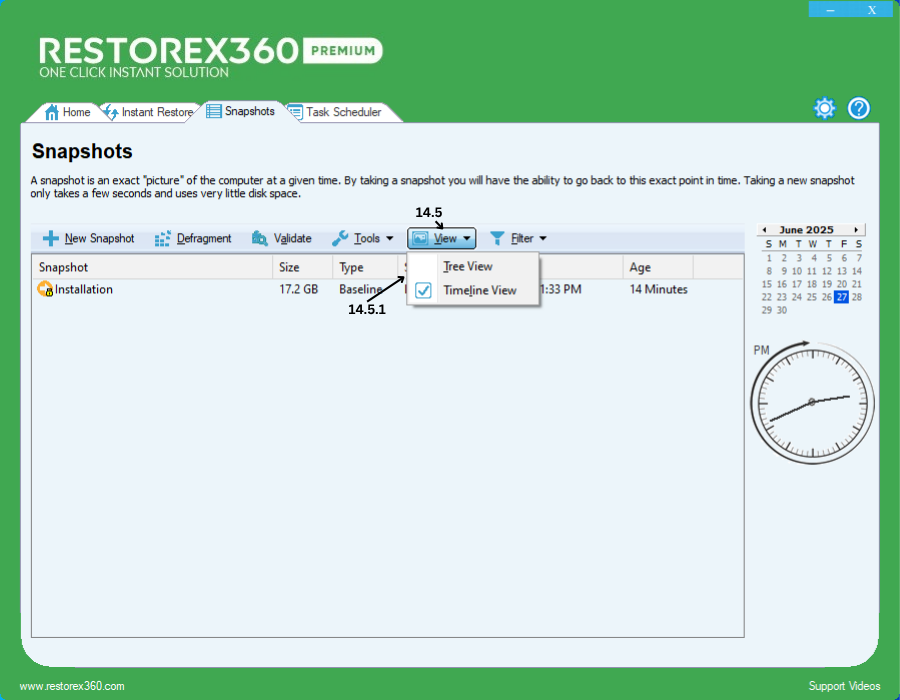
14.5 View All Snapshots
14.5.1 Snapshot Tree View
View all available snapshots in a structured tree view format for easier navigation and management.
14.5.2 Snapshot Diagram
A visual diagram is displayed to show the relationship and sequence of all snapshots.
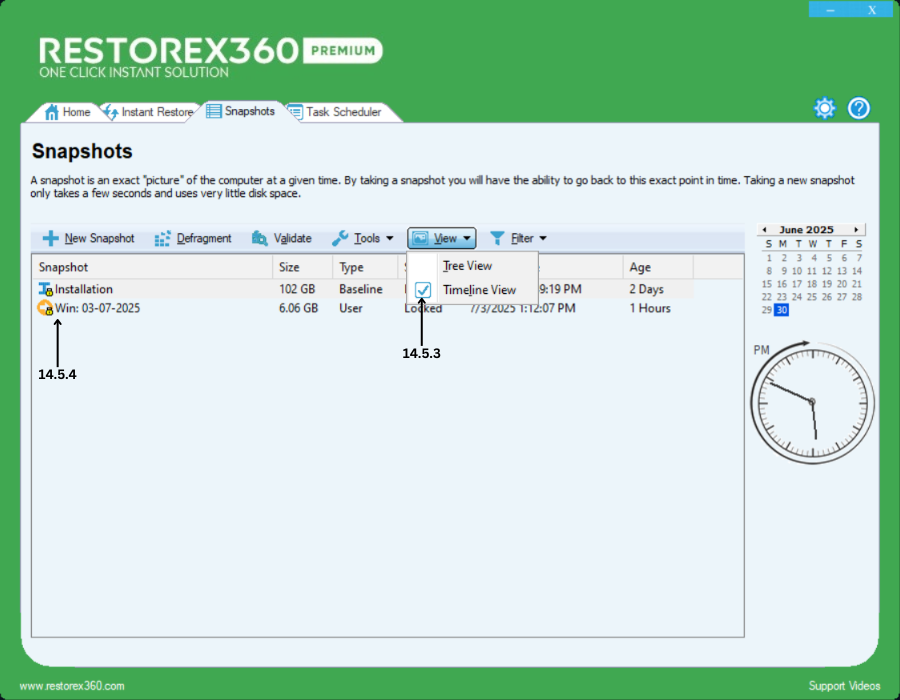
14.5.3 Snapshot Timeline View
Displays all available snapshots in a time-based view, allowing for easier navigation and chronological understanding of snapshot creation.
14.5.4 Snapshot Diagram
Shows a visual diagram representing the relationship and sequence of all snapshots, helping you understand their structure and dependencies.
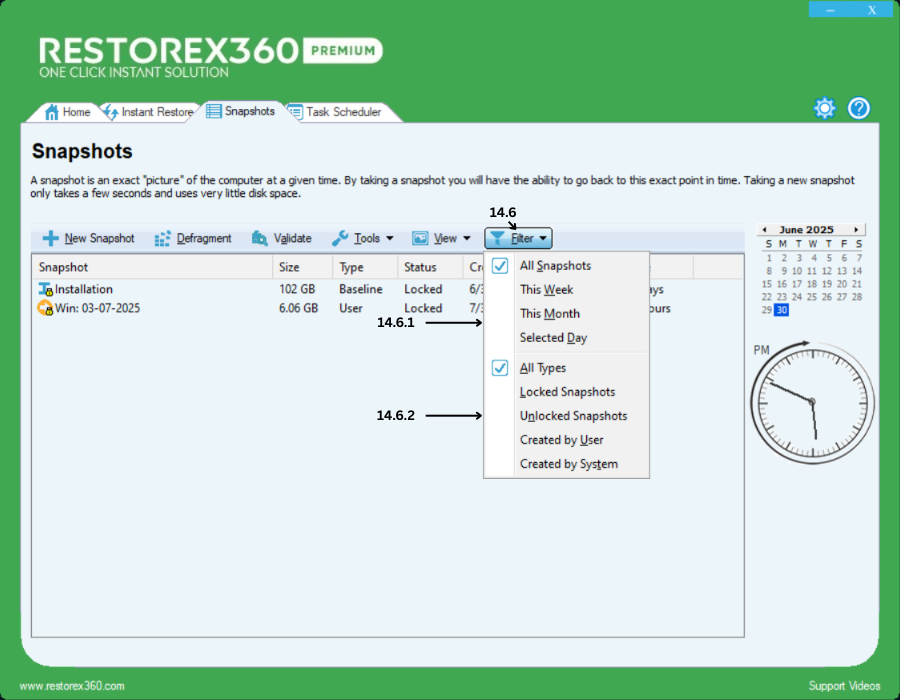
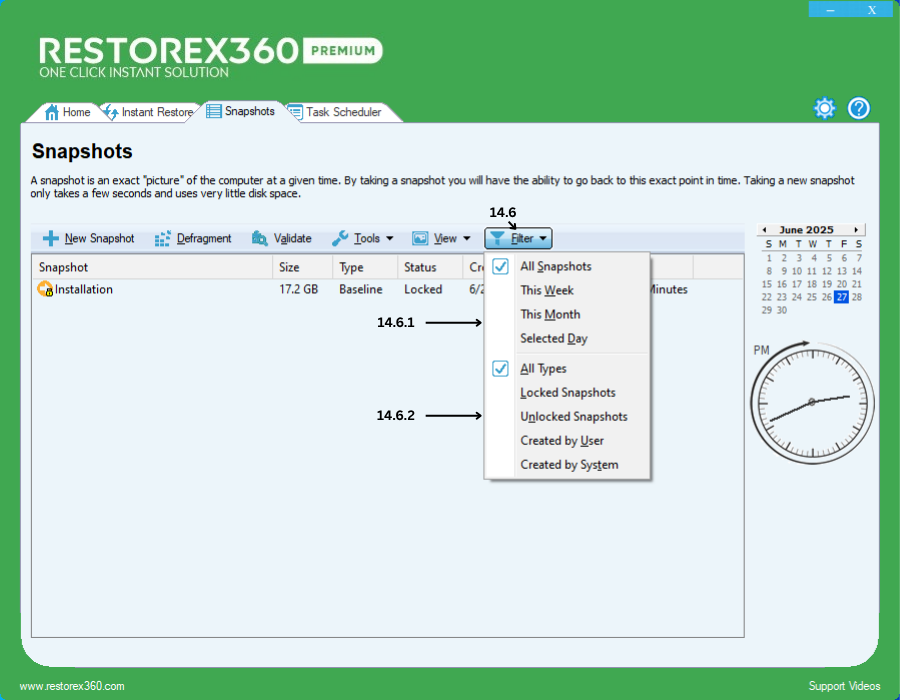
14.6 Filter Options
The Filter option allows you to manage and view snapshots based on various criteria, including:
-
All Snapshots – Displays all snapshots created by both the user and the system.
-
This Week – Shows all snapshots created within the current week.
-
This Month – Shows all snapshots created within the current month.
-
Selected Day – Displays snapshots created on a specific selected date.
-
All Types – Lists all snapshots, including both locked and unlocked, whether created by the user or the system.
-
Locked Snapshots – Displays only the snapshots that are currently locked.
-
Unlocked Snapshots – Displays only the snapshots that are currently unlocked.
-
Created by User – Shows snapshots manually created by the user.
-
Created by System – Shows snapshots automatically created by the system.
These filters help you quickly locate and manage specific snapshots based on time, type, or source of creation.