1.1. Installing RestoreX360 Premium
Before beginning the installation process, please close all running applications to ensure a smooth setup.
Installation Steps:
1. Download the Installer:
-
Visit our Website, Go to Download Page https://www.restorex360.com/download/2. If Downloaded as a ZIP File:
-
First, extract the contents of the compressed ZIP file.
-
Once extracted, navigate to the RestoreX360 Premium folder.
-
Double-click setup.exe to begin the installation.
3. Begin Installation:
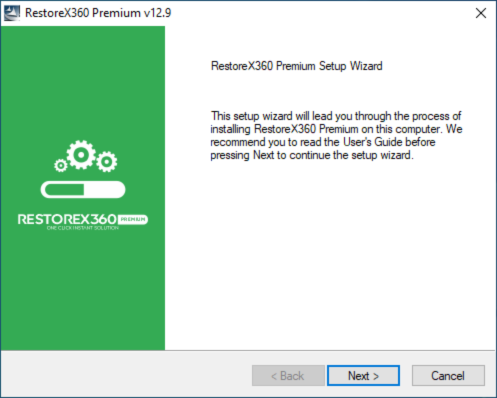
-
A Welcome screen will appear once the setup starts.
-
Click “Next” to proceed with the installation process.
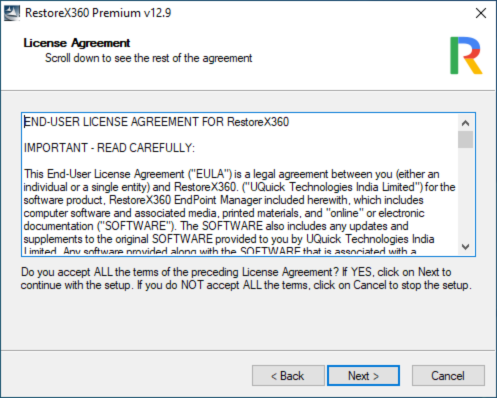
Continuing the Installation
Click on Next if you Accept the License Agreement: Read the End User License Agreement carefully.
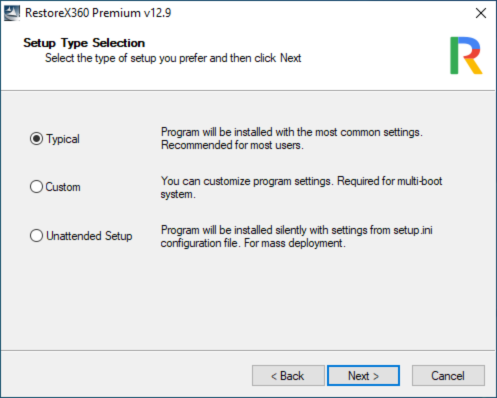
Installation Options
The RestoreX360 Premium setup program provides three installation options, allowing flexibility based on your system requirements and deployment needs:
1. Typical Setup
Installs RestoreX360 Premium with default settings. This option is recommended for most users. It includes:
-
Copies program files to the default directory: C:\Program Files\Shield
-
Protects C: Drive partitions on the primary hard drive
-
Disables access control (no password required to access RestoreX360 Premium consoles)
-
Disables Windows System Restore
2. Custom Setup
Allows you to configure advanced installation settings. This option is ideal for experienced users and IT administrators. Customization options include:
-
Choose the destination folder for program files
-
Select specific partitions to protect
-
Enable or disable access control, including setting an administrative password
-
Enable or disable Windows System Restore
-
Configure RestoreX360 Premium for multi-boot systems
3. Unattended Setup
Used for mass deployment across a network of computers with pre-configured settings.
-
RestoreX360 Premium reads settings from a setup.ini configuration file
-
Use the Setup.INI Wizard (located in the Deployment Tools folder of the installation package) to create and configure this file
-
Ideal for deployment using tools such as Windows Active Directory, network logon scripts, system images, or other software deployment solutions
Unattended Deployment
To perform large-scale RestoreX360 Premium deployments using:
-
Windows Active Directory
-
Software deployment tools
-
Network logon scripts
-
Pre-configured system images
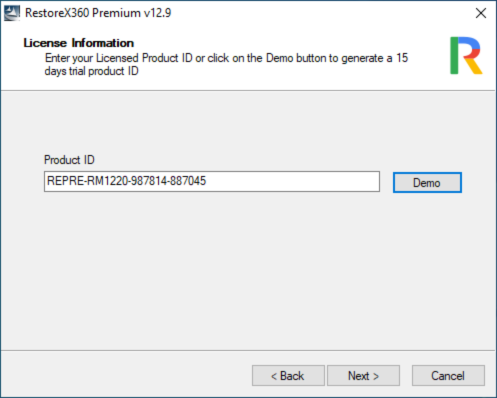
Entering Your Product ID
After selecting your preferred installation option, you will be prompted to enter your purchased Product ID to activate RestoreX360 Premium.
-
If you have a valid license, enter the Product ID provided at the time of purchase.
-
If you are evaluating the software, simply click the "DEMO" button. This will automatically insert the default demo license key for trial use.
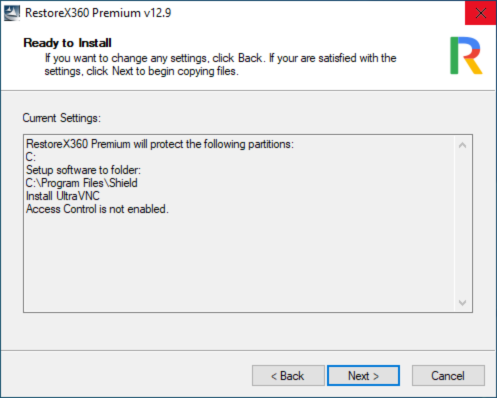
As the last step, review all the settings you have configured during the installation process. Once you have verified everything is correct, click "Next" to proceed.
This will initiate the final phase of the installation and apply your selected settings.
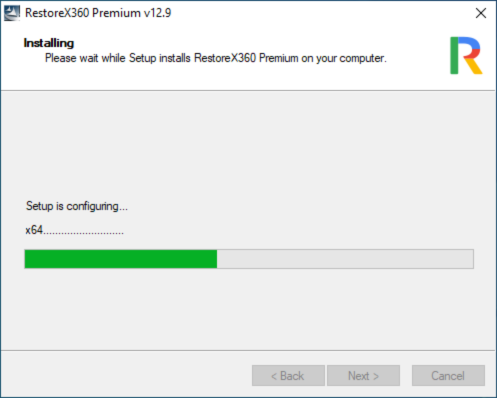
Please wait while RestoreX360 Premium installs all the necessary support files. This process may take a few moments to complete.
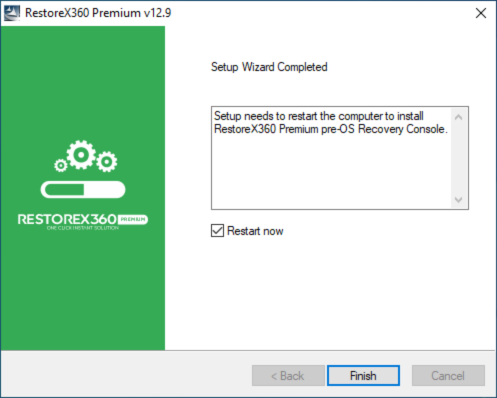
Completing the Installation
Click "Next" to begin the installation process. Once all files have been successfully installed, a confirmation window will appear indicating that the setup is complete.
Click "Finish" to restart your computer and finalize the installation of RestoreX360 Premium.
⚠️ Note: A system restart is required for the software to be fully activated and functional.